
Why a Homemade Cake is Special
Celebrating a loved one’s birthday is always special, and nothing makes it more memorable than a cake baked with love. While store-bought cakes are convenient, baking from scratch gives you full control over flavor, texture, and decoration.
More importantly, a homemade cake adds a personal and heartfelt touch that no bakery can match. You get to choose your ingredients, adjust the sweetness, and experiment with flavors such as vanilla, chocolate, or fruit. This makes the cake unique to the person you are celebrating.
In this step-by-step guide, I will show you how to make a soft, moist, and beautifully decorated birthday cake. From creaming butter and sugar to folding in flour, adding flavors, and achieving the perfect bake, each stage is explained clearly. Even beginners can follow with confidence.
Whether you are baking for your child, partner, parent, or a close friend, this easy recipe will help you create a stunning centerpiece. The cake won’t just taste amazing—it will make the celebration unforgettable.
Best Step-by-Step Cake Mixing and Folding Process
Step 1: Add the Eggs Gradually
After folding your flour mixture into the butter and sugar mixture, start adding the beaten eggs little by little. This gradual process creates a smooth and even batter without lumps.
If you pour all the eggs at once, the mixture may curdle or feel too heavy, which affects the cake’s texture. Since this recipe does not include milk, adding eggs slowly also keeps the batter soft and well balanced.
If you prefer, you can replace part of the eggs with milk for a lighter texture. The key is patience—mix slowly until everything combines into a smooth, fluffy batter.
Step 2: Prepare Your Baking Pan
Before pouring in the mixture, prepare your baking pan. Choose a pan shape that suits the occasion—round for birthdays, square for family cakes, or rectangular for easy slicing.
Apply a thin layer of butter to the inside of the pan, covering the bottom and sides. Use a brush so the butter reaches every corner. Greasing the pan is crucial because without it, the cake can stick after baking.
Once greased, sprinkle a little flour into the pan and shake it until it coats the buttered surface. This prevents the cake from sticking and also stops it from becoming too oily.
Step 3: Pour and Settle the Batter
Pour the cake mixture gently into the prepared pan. Use a spatula or spoon to spread it evenly so the surface is flat.
To remove air bubbles, tap the pan lightly on the table two or three times. This helps the batter settle and ensures an even bake without holes inside. A smooth surface also makes decorating easier once the cake is done.
Step 4: Bake the Cake
Place the filled pan in a preheated oven and bake for about 45 minutes at the recommended temperature. Avoid opening the oven door too often, as sudden changes in temperature can cause the cake to sink.
After 45 minutes, test the cake by inserting a toothpick into the center. If it comes out clean, the cake is ready. If it comes out sticky, bake for a few more minutes before testing again.
Step 5: Cool and Remove the Cake
When the cake is fully baked, remove it from the oven and let it cool for a few minutes in the pan. Run a knife gently around the edges to loosen any parts that may be sticking.
Flip the cake carefully onto a clean tray or wire rack. Allow it to cool completely before decorating or serving. Decorating while it is still warm may cause the icing or toppings to melt.
At this stage, you have a soft, fluffy, and perfectly baked cake. Enjoy it plain or decorate it into a stunning centerpiece for the celebration.
How to Prepare Your Cake for Butter Icing
Step 1: Level the Cake Surface
Before you begin decorating, it’s important to prepare your cake so the butter icing sits smoothly and looks neat. Start by trimming off the caramelized or uneven top of the cake using a serrated knife or cake scraper. This creates a flat, even surface, which makes icing easier and more professional-looking. If you skip this step, your icing may look rough or bumpy, which reduces the overall appearance of the cake. A leveled cake is the secret to achieving that bakery-style finish even when baking at home.
Step 2: Slice the Cake into Layers
To make the cake more exciting and delicious, cut it into two equal layers by slicing horizontally through the middle. Although this step is optional, it allows you to spread butter icing or filling between the layers so that every bite of cake has a creamy surprise inside. This technique is especially useful for birthday cakes, as it adds richness and beauty when the cake is sliced and served. After cutting, carefully set the layers aside on a clean tray while you prepare the butter icing.
Step 3: Prepare the Butter Icing
For this tutorial, I used a mix of Nigerian butter icing and American buttercream. Combining the two gives you a buttercream that is silky-smooth, light, and easy to spread while still holding its shape for decorating. To add beauty, I colored mine with rose-pink food coloring, but you can choose any shade that suits the theme of your event—whether it’s soft pastels for a child’s cake or bold colors for an adult celebration. Good butter icing not only enhances the look of your cake but also makes it taste even more delicious.
Step 4: Secure the Cake on the Board
Before applying any icing, secure your cake firmly to the cake board. Spread a small amount of buttercream in the middle of the board, then place your first cake layer on top. This step works like glue, preventing the cake from moving or sliding while you decorate. A stable cake is very important, especially if you plan to pipe designs, carry it to a party, or display it as a centerpiece.
Step 5: Start the Icing Process
Now it’s time to ice your cake. Begin by spreading butter icing evenly over the first layer. If you sliced your cake, add a generous amount of buttercream between the layers before stacking them. Once the layers are stacked, cover the entire cake with a thin “crumb coat.” This light layer of icing traps crumbs and gives you a smooth base to work on. Place the cake in the fridge for about 10–15 minutes to set the crumb coat. After chilling, spread a thicker layer of buttercream all over the cake and smooth it out with a spatula or icing smoother. This final coat should look clean, polished, and ready for decorating.
Decorating with Butter Icing Made Simple
Decorating a cake with butter icing often looks complicated to beginners, but once you understand the basic steps, it becomes both easy and enjoyable. One of the most important techniques to master is the crumb coat, a thin base layer of icing that traps crumbs and creates a smooth surface for your final decoration. This simple method ensures your cake looks neat, professional, and bakery-quality, even if you are decorating at home for the first time. Here’s how to apply butter icing and crumb coat step by step.
Step 1: Place and Layer the Cake
Begin by placing the first half of your cooled cake on a prepared cake board. Spread a generous layer of butter icing on top using a spatula, making sure the icing is even and level. This step is important because it helps the second layer of cake sit neatly without leaning to one side. Once the surface is smooth, gently place the second half of the cake on top to create a layered cake. Press lightly to secure the layers, but avoid pushing too hard to prevent the icing from spilling out.
Step 2: Apply the Crumb Coat
Next, move on to the crumb coat—the thin layer of icing that seals in all the loose crumbs. Spread a light, even layer of butter icing over the top and sides of the cake, ensuring every part is lightly covered. At this stage, don’t worry about making the cake look perfect; the crumb coat is only meant to trap crumbs and prepare the cake for the final icing. Once the cake is fully coated, place it in the fridge or a cool area for about 15–20 minutes to allow the crumb coat to set and harden slightly.
Step 3: Add the Final Butter Icing
When the crumb coat is firm, apply a thicker, more generous layer of butter icing on the cake. Cover both the top and sides completely, then use your spatula to spread it evenly. For a polished finish, take a cake scraper or flat edge and gently smooth the icing by gliding it around the sides and across the top. This step gives your cake a clean, professional look that makes it ready for further decoration.
Finishing Touches
With this simple method, even beginners can achieve a bakery-standard finish without advanced decorating skills. Once the butter icing is smooth, you can choose to leave it plain for a simple and elegant look, or take it a step further by adding piped borders, colorful sprinkles, edible flowers, or even writing a birthday message with icing. The crumb coat and final icing create the perfect foundation for any decoration, making your cake not only taste delicious but also look stunning for any celebration.
Decorating a Birthday Cake with a Smooth Finish and Elegant Borders
Once your cake has been layered and covered with butter icing, the next step is to decorate it in a way that makes it visually appealing and suitable as a centerpiece for any celebration. Cake decorating may look intimidating at first, but with simple techniques, you can achieve a smooth, professional finish that impresses family, friends, or clients. The process involves smoothing the surface, piping attractive borders, and adding finishing touches that reflect the theme of the occasion. Here’s how to decorate your birthday cake step by step.
Step 1: Smooth the Surface of the Cake
Begin by smoothing out the butter icing on the cake. A flat cake scraper works perfectly for achieving a sleek, even finish, while a patterned scraper can add simple designs or textures to the sides. If you scrape off too much icing by mistake, don’t panic, simply apply a little more butter icing and smooth it out again until you achieve the desired look. Pay extra attention to the top of the cake, ensuring it is neat, flat, and even, as this will make the overall presentation much more polished. Once you’re satisfied with the smoothness, carefully wipe your cake board clean so it looks tidy and professional when presented.
Step 2: Pipe the Borders
To give your cake an elegant finish, use a piping bag fitted with your preferred nozzle. Fill the bag with butter icing and practice a few strokes on parchment paper before piping directly onto the cake. For beginners, the reverse shell border is one of the easiest and most attractive designs, giving the cake a neat and professional edge. Pipe steadily around the top edge of the cake, then repeat the process along the bottom edge for a balanced, finished look. Borders not only add beauty but also help cover any small imperfections around the edges.
Step 3: Add Final Decorations
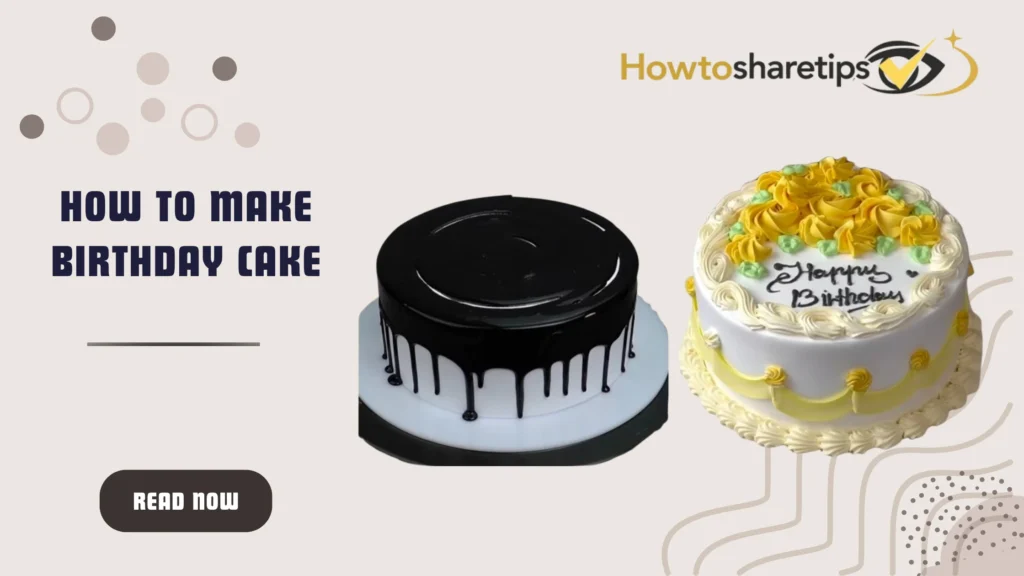
Once the borders are complete, add your personal finishing touches to highlight the special occasion. Place a “Happy Birthday” topper in the center of the cake to make the celebration clear and festive. For extra charm, sprinkle on edible decorations such as sugar pearls, colorful sprinkles, or edible glitter to bring vibrancy to the cake. Depending on the event, you can adjust the decorations to match the theme, for instance, red and pink accents for Valentine’s Day, gold sprinkles for anniversaries, or bright rainbow colors for children’s birthdays.
With these simple yet effective decorating steps, your cake will not only taste delicious but also look stunning. Even if you are a beginner, practicing these techniques will help you achieve a polished, professional finish that makes every celebration memorable. Whether for family, friends, or customers, a neatly decorated cake with smooth icing, elegant borders, and festive decorations always leaves a lasting impression.
How to Make the Best Nigerian Birthday Cake Recipe with Butter Icing for Beginners
If you’ve ever wanted to bake and decorate a birthday cake at home but didn’t know where to start, this guide is for you. With this step-by-step Nigerian birthday cake recipe, you’ll learn how to bake a soft and delicious cake from scratch, how to prepare butter icing, and how to decorate your cake beautifully even as a beginner. This method is simple, beginner-friendly, and perfect for home bakers or anyone who wants to start cake decoration for catering. By the end, you’ll know how to bake, crumb coat, smoothen butter icing, and pipe simple cake borders that look professional.
Using keywords like birthday cake recipe, Nigerian cake, butter icing recipe, how to decorate cake step by step, and simple birthday cake design, this tutorial is exactly what thousands of people search for daily when looking for easy cake recipes and cake decoration ideas.
Step 1: Bake a Soft Nigerian Birthday Cake
Start by preparing your cake batter. In a clean bowl, mix margarine until soft, add sugar, and beat until pale and fluffy. Add eggs one by one, then fold in your flour and baking powder mixture gently until smooth. Pour the cake mixture into a greased and floured cake pan, tap to remove air bubbles, and bake for about 45 minutes. When done, remove from the oven and allow it to cool completely before decorating.
Step 2: Prepare and Apply the Crumb Coat
Once your cake has cooled, level the top by scraping off the caramelized layer to make it flat. Place the first half of your cake on a cake board, spread butter icing on top, and place the second half over it. Apply a thin layer of butter icing all over the cake, this is called a crumb coat. It traps crumbs and prepares the cake for the final finish.
Step 3: Smoothen with Butter Icing
After the crumb coat, apply a second, thicker layer of butter icing. Spread generously on the top and sides of the cake. Use a scraper to smoothen the icing until it looks neat. If you accidentally remove too much, add more icing and smooth again. Clean your cake board so that the presentation looks professional.
Step 4: Pipe Simple Cake Borders
Fill a piping bag with butter icing and use a nozzle to pipe around the edges of your cake. Beginners can start with the reverse shell border design, which is simple and elegant. Pipe steadily along the top and bottom borders of the cake to give it a finished look.
Step 5: Decorate and Add Final Touches
Now for the fun part—decorating! Place a “Happy Birthday” cake topper at the center, then add sprinkles, sugar pearls, or edible decorations of your choice. This cake can be used for birthdays, anniversaries, weddings, Valentine’s Day, or any other celebration.
Beginner Tips for Cake Decoration
Cake decoration requires patience, so don’t rush the process. Take your time to smooth the butter icing carefully, practice piping designs on parchment paper before decorating your cake, and always clean your cake board for a neat finish. The more you practice, the better your skills will get.
Conclusion
With this Nigerian birthday cake recipe and butter icing tutorial, you can bake and decorate a beautiful cake from scratch at home. Whether you’re baking for your family, a loved one’s birthday, or even starting a catering business, this step-by-step guide gives you the confidence to make simple birthday cake designs that look professional.
FAQs About Nigerian Birthday Cake and Butter Icing
1. What is the best icing for Nigerian birthday cakes?
Butter icing is the most common and beginner-friendly icing for Nigerian cakes. It is smooth, tasty, and easy to decorate with.
2. Can I substitute margarine with butter?
Yes, you can use either butter or margarine. Butter gives a richer flavor, while margarine is more affordable and works well for large batches.
3. How long should I bake my cake?
Bake at medium heat for about 45–50 minutes, depending on your oven. Always check with a toothpick—if it comes out clean, the cake is done.
4. How do I stop my cake from sticking to the pan?
Grease your pan with margarine or butter, dust with flour, and tap out the excess before pouring in your batter. This prevents sticking.
5. Can I make this cake for occasions other than birthdays?
Yes! This cake recipe works for weddings, anniversaries, Valentine’s Day, or any event where you want a soft and delicious cake.

