Screen recording on a Mac is a powerful feature that lets you capture your actions on the screen. Whether you want to create a tutorial, deliver a presentation, or showcase a demo, screen recording helps you share your knowledge clearly and effectively. While some new Mac users may find screen recording intimidating, it is actually very easy when you follow a structured approach.
In this guide, you will learn how to screen record on Mac using two different methods: the built-in Screenshot app and QuickTime Player. Additionally, I’ll share tips and tricks to make your recordings more engaging, including adding audio, highlighting mouse clicks, and editing your videos.
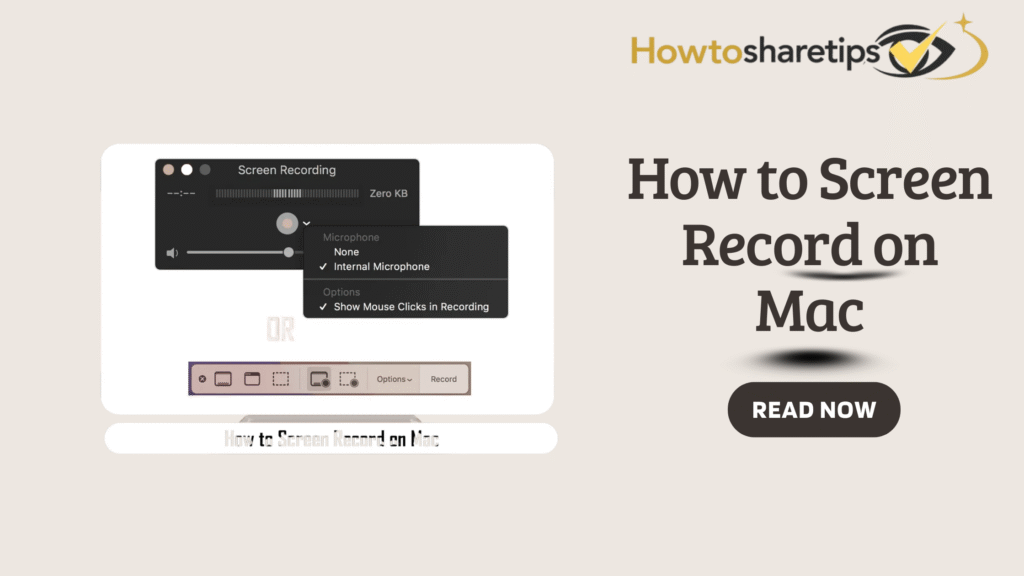
Method 1: Screen Record on Mac Using the Screenshot App
The Screenshot app comes pre-installed on macOS Mojave and later versions. It allows you to take screenshots and record your screen quickly with a simple keyboard shortcut.
Here’s how to use it:
-
Press Command + Shift + 5 to open the Screenshot toolbar at the bottom of your screen.
-
Choose between Record Entire Screen or Record Selected Portion, depending on whether you want to capture your full screen or just a section.
-
Click Options to customize your recording settings. You can select a save location, set a timer, choose a microphone, and enable mouse clicks.
-
Click Record to start. A Stop button appears in the menu bar—click it to end your recording.
-
Your recording will be saved in the selected location. You can open it with QuickTime Player or other video apps for playback or editing.
Method 2: Screen Record on Mac Using QuickTime Player
QuickTime Player offers more control over your screen recordings, including audio options and editing tools. Follow these steps:
-
Open QuickTime Player from your Applications folder or use Spotlight to search for it.
-
Click File, then select New Screen Recording.
-
Click the arrow next to the Record button to adjust settings. Choose a microphone, adjust the volume, and enable mouse clicks.
-
Click Record, then click the screen to record the entire screen or drag to select a portion.
-
Click the Stop button in the menu bar to finish recording. Your video opens in a new window.
-
Use the Edit menu to trim, split, rotate, or flip your video. Use the View menu to add annotations and filters.
-
Click File > Save to save your recording. You can share it directly via YouTube, Mail, or other apps using the Share menu.
Tips and Tricks for Better Screen Recordings
To make your screen recordings more effective and professional, follow these best practices:
-
Plan Ahead: Close unnecessary apps, turn off notifications, and adjust your screen brightness and resolution before recording.
-
Practice First: Do a test run to check your audio, video quality, and timing. Speak clearly, confidently, and avoid filler words like “um” or “ah.”
-
Use Creative Tools: Enhance your recordings using Keynote for slides and animations or iMovie to add music, voiceovers, and effects.
-
Keep It Concise: Focus on the main message and avoid unnecessary content. Aim for recordings under 10 minutes for better viewer engagement.
Screen recording on Mac is simple, fast, and highly effective. Whether you use the Screenshot app or QuickTime Player, you can create professional-looking recordings in just a few steps. By planning, practicing, and using creative editing tools, your recordings will not only convey information but also engage your audience effectively. Start recording today and turn your Mac into a powerful presentation and tutorial tool.